Installation Process Guide — Joplin, MO
How Epoxy Flooring Is Installed, Step by Step
Last updated: July 2026
A real, no-surprises walkthrough of what happens between your estimate and your finished floor — day by day, step by step.
In This Guide
The Short Version
Most Residential Floors Take 1–2 Days
A standard garage floor runs one to two days from prep to final topcoat, though the floor needs another 24–72 hours after we leave before it’s ready for foot traffic and vehicles. Basement floors sometimes add a day if moisture testing turns up a reading that needs a vapor barrier primer. Commercial and warehouse jobs scale up from there depending on square footage and whether we’re working around business hours.
What actually drives the timeline isn’t the coating application itself — that part goes fast. It’s the prep work underneath it, which is exactly the part a rushed or budget install tends to skip. See our cost guide for how prep scope affects pricing too.
What Happens When
A Typical Garage Floor, Day by Day
Click a day to see what we’re doing on-site and what it sounds/looks like from your end.
Grinding, Repair & Base Coat
Expect diamond grinding equipment and a fair amount of noise and dust (we contain it with vacuum-attached grinders). Any cracks get routed and filled, moisture testing happens if it wasn’t already done at the estimate, and the base epoxy coat goes down by end of day.
Typical duration: 4–6 hours on-site.
The Full Breakdown
Every Step, Explained
Moisture Testing & Assessment
Before any grinding starts, we check the slab’s condition and, for basements or slabs with a water history, run a calcium chloride or RH probe test. See our moisture guide for how these tests actually work.
Diamond Grinding
Mechanical grinding opens the concrete’s pores and removes any existing coating, sealer, or contamination. This is the step a rushed acid-etch-only job skips, and it’s the biggest factor in how long a coating actually bonds.
Crack & Spall Repair
Cracks get routed out and filled with a flexible epoxy filler before coating — coating directly over an unrepaired crack just telegraphs it straight through the new floor.
Vapor Barrier Primer (If Needed)
If testing came back with an elevated reading, a vapor barrier primer goes down first. Most Joplin basements fall in the range this handles on its own.
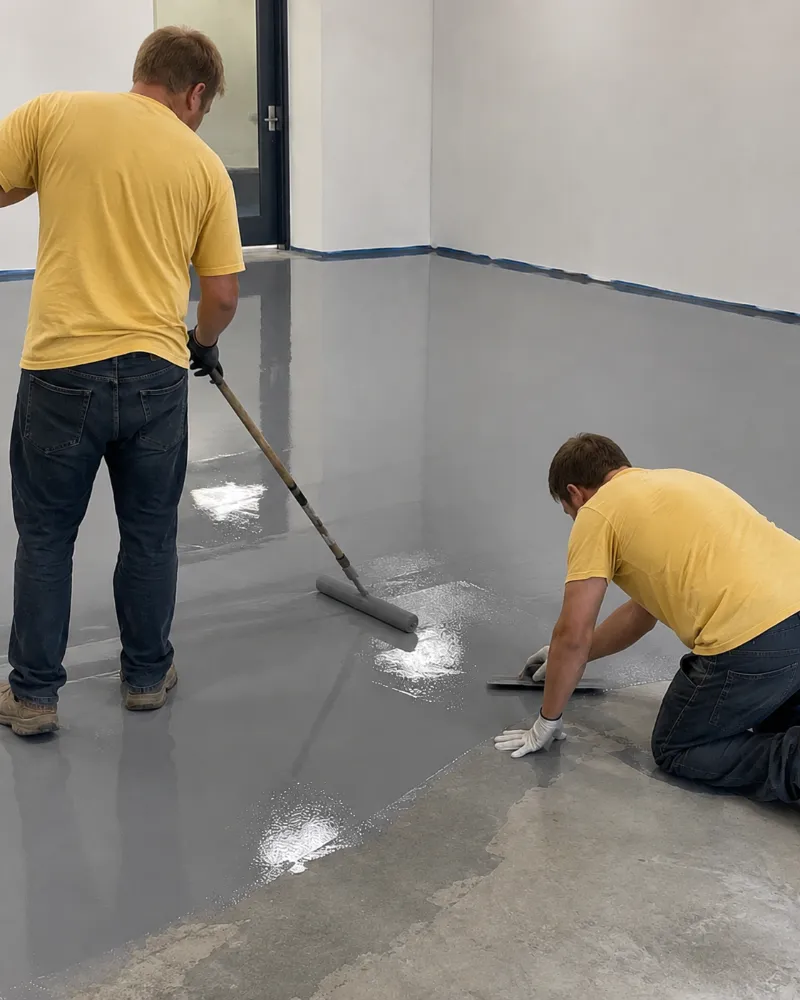
Base Coat Application
The pigmented epoxy base coat is rolled on, giving the floor its primary color and the surface the flake or topcoat will bond to.
Flake Broadcast (Optional)
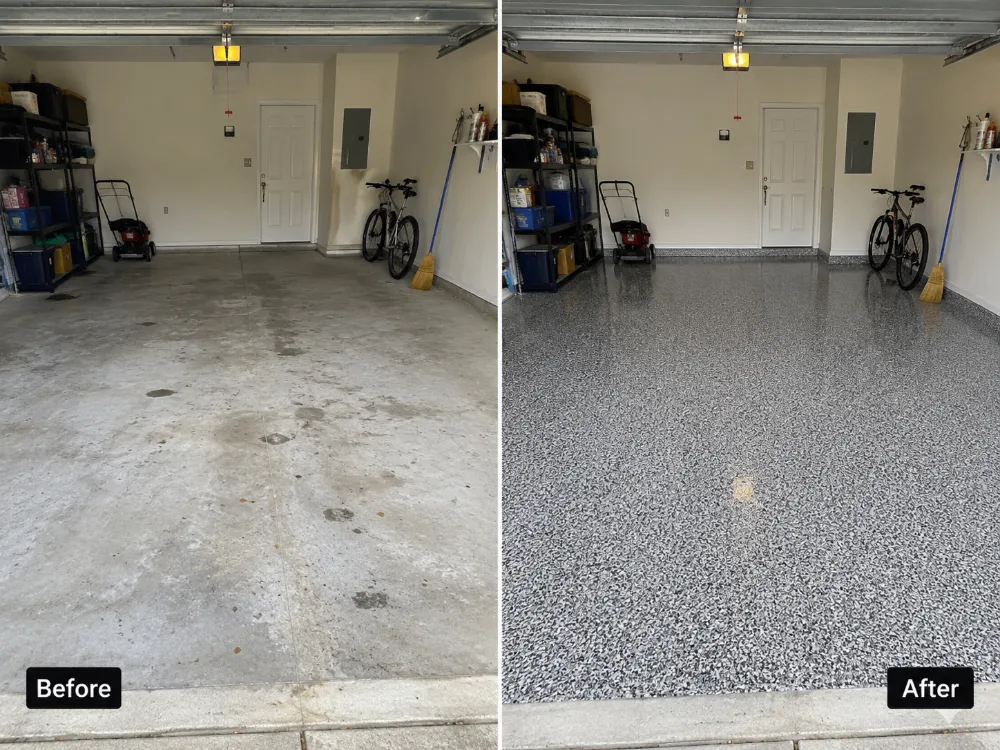
For flake systems — our most common install — decorative chips are broadcast by hand into the wet base coat for texture, hot-tire resistance, and hiding minor imperfections.
Clear Topcoat
A clear polyaspartic or epoxy topcoat seals the whole system, adding UV stability (critical for outdoor spaces), chemical resistance, and the final gloss level.
Cure & Walkthrough
We walk the finished floor with you before we leave, then follow up once it’s fully cured to confirm everything looks and performs the way it should. See our care and maintenance guide for keeping it that way.
Before We Arrive
How to Get Your Space Ready
A few minutes of prep on your end keeps the job on schedule and avoids delays once we’re on-site.
Get My Free Estimate-
Clear the space completely
Vehicles, storage, shelving — anything on the floor needs to be moved out before we arrive.
-
Plan for the noise and dust of grinding day
We contain dust with vacuum-attached equipment, but grinding is loud — worth knowing if you work from home.
-
Arrange an alternate parking spot
Vehicles stay off the floor for a full 72 hours after the topcoat — plan for driveway or street parking that long.
-
Keep pets away during and after
Curious pets and wet epoxy don’t mix — keep them out of the space through the full cure window.
Process FAQ
Questions About the Install Itself
Have a scheduling question? Ask during your free estimate.
Get a Free Estimate- Light foot traffic is usually fine after 24 hours, but full vehicle weight needs a full 72 hours to avoid tire-mark damage while the coating finishes hardening.
- Our grinders are vacuum-attached, so airborne dust is minimal, but there’s still concrete dust and noise involved — worth planning around if the space is attached to living areas.
- Yes — commercial installs are frequently scheduled around business hours or over a weekend to minimize disruption. We’ll map out timing during your estimate.
- Epoxy needs a dry, temperature-stable window to cure properly, so outdoor installs are scheduled around the forecast. If weather turns, we reschedule rather than risk a compromised cure.
Free Estimates
Know Exactly What to Expect —
Before You Book
Every estimate includes a clear timeline for your specific space, so there’s no guessing on scheduling.
Get My Free Estimate